To install the Zoom desktop client on your machine:
- In your internet browser, enter https://zoom.us/download.
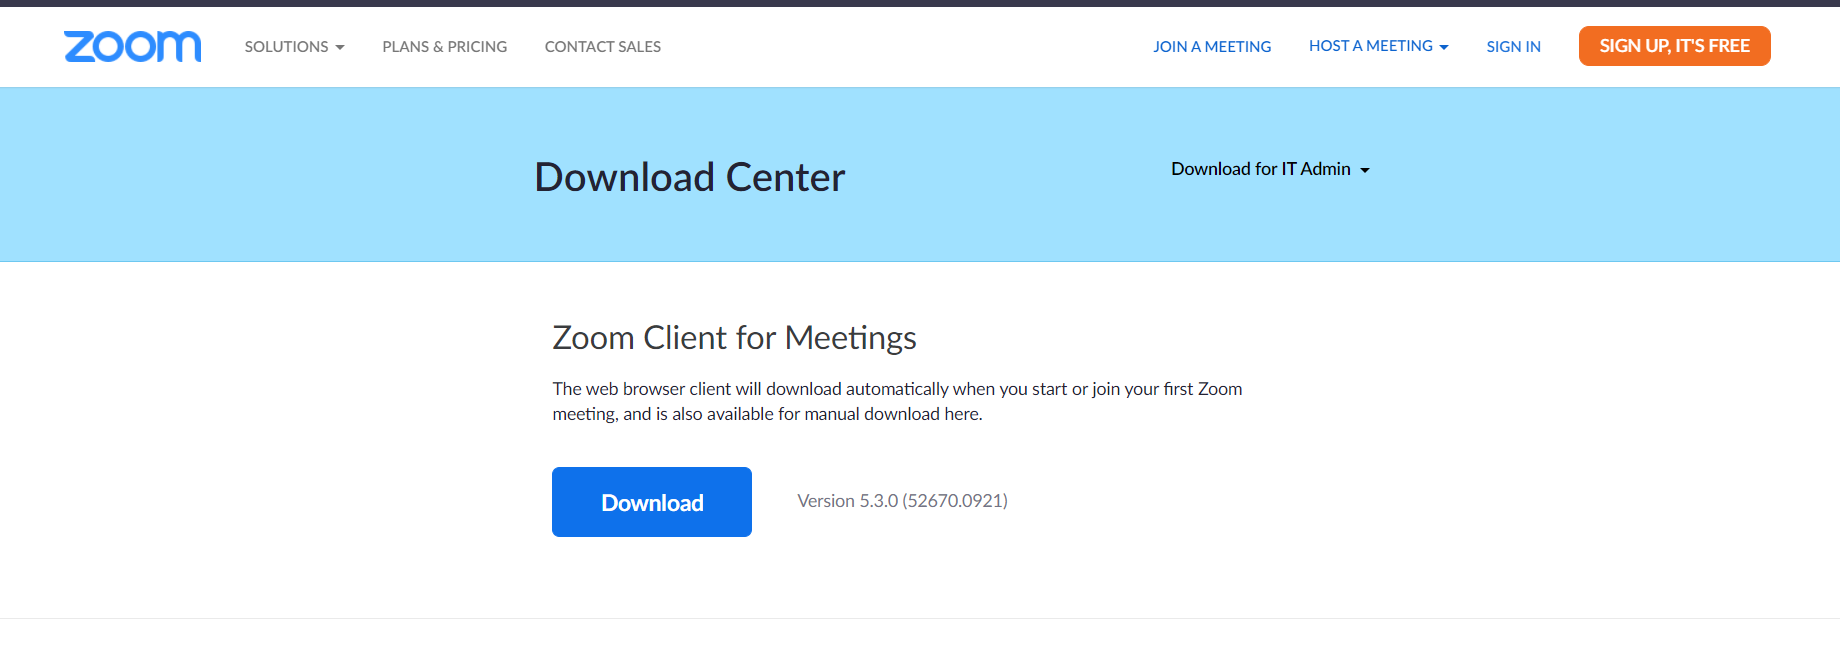
Under Zoom Client for Meetings, click the Download button.
Double-click the ZoomInstaller, which is the file you downloaded from the website.
Next, login to your WUST account.
In order to launch the Zoom client:
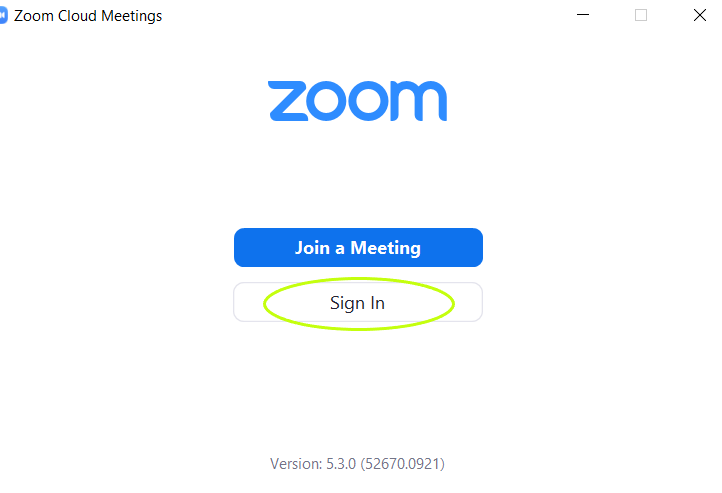
- Click the Zoom client in the installation location.

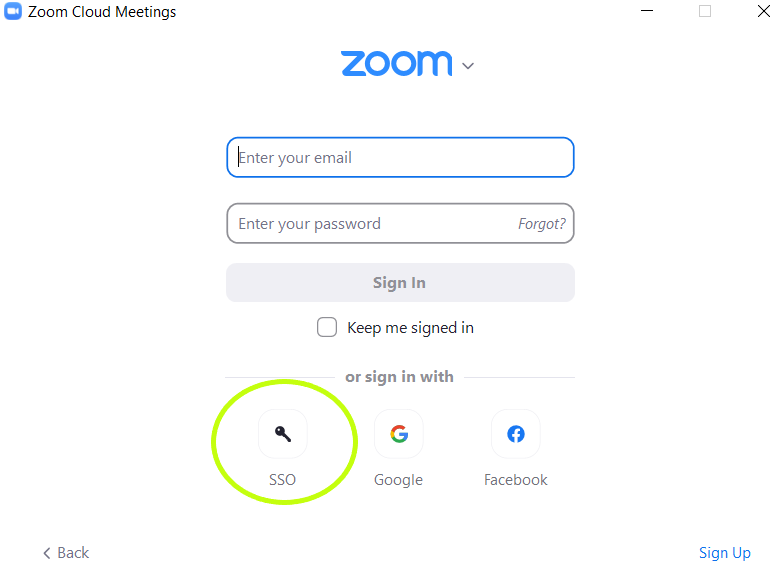
- Press the Sign In button.
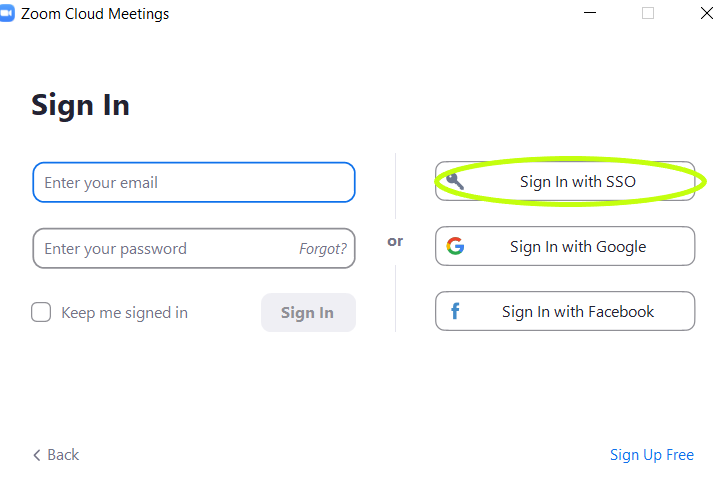
- Click the Sign In with SSO (Note! You can log in only via the WUST website).
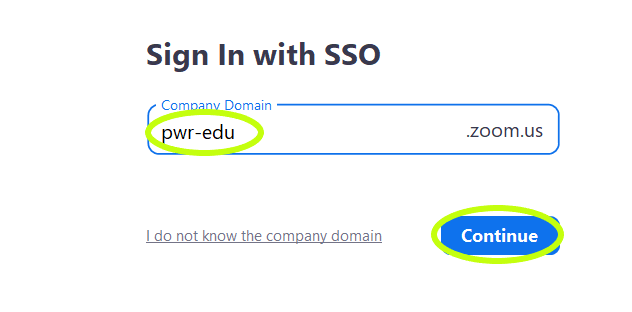
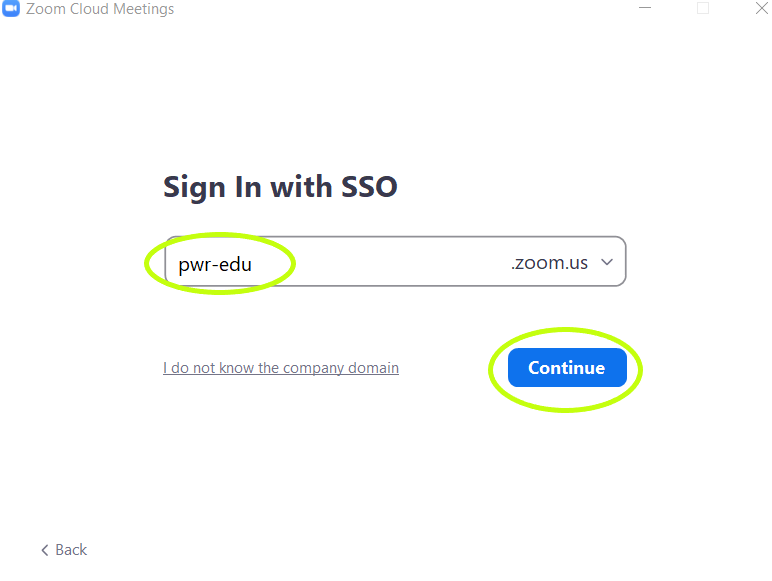
- Provide the SSO address, i.e. only the pwr-edu part (the rest is already provided), click on Continue.
- You will be redirected to the WUST account authentication website – institutional login.
Follow the instructions provided in the logging-in chapter, for hosts and for participants.
- Click Open Zoom Meetings to launch the Zoom client.
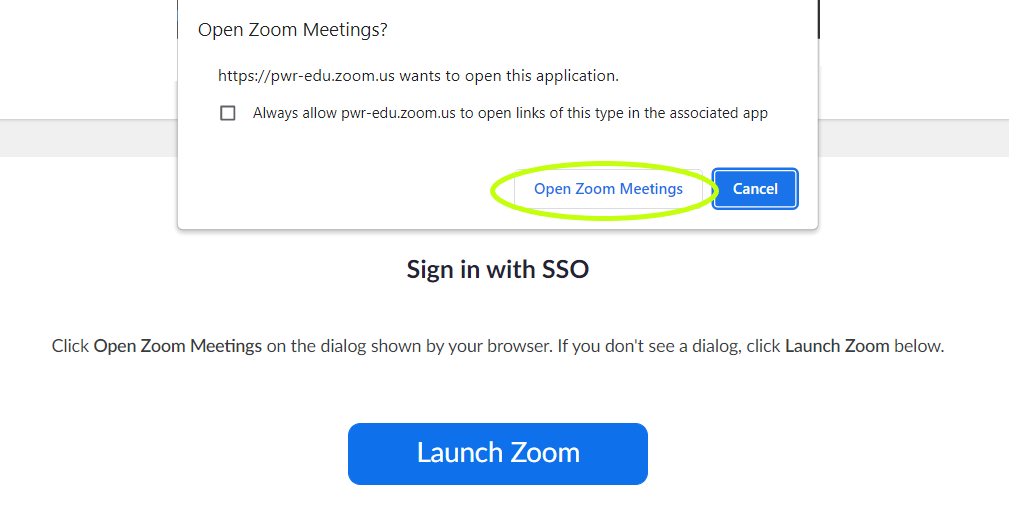
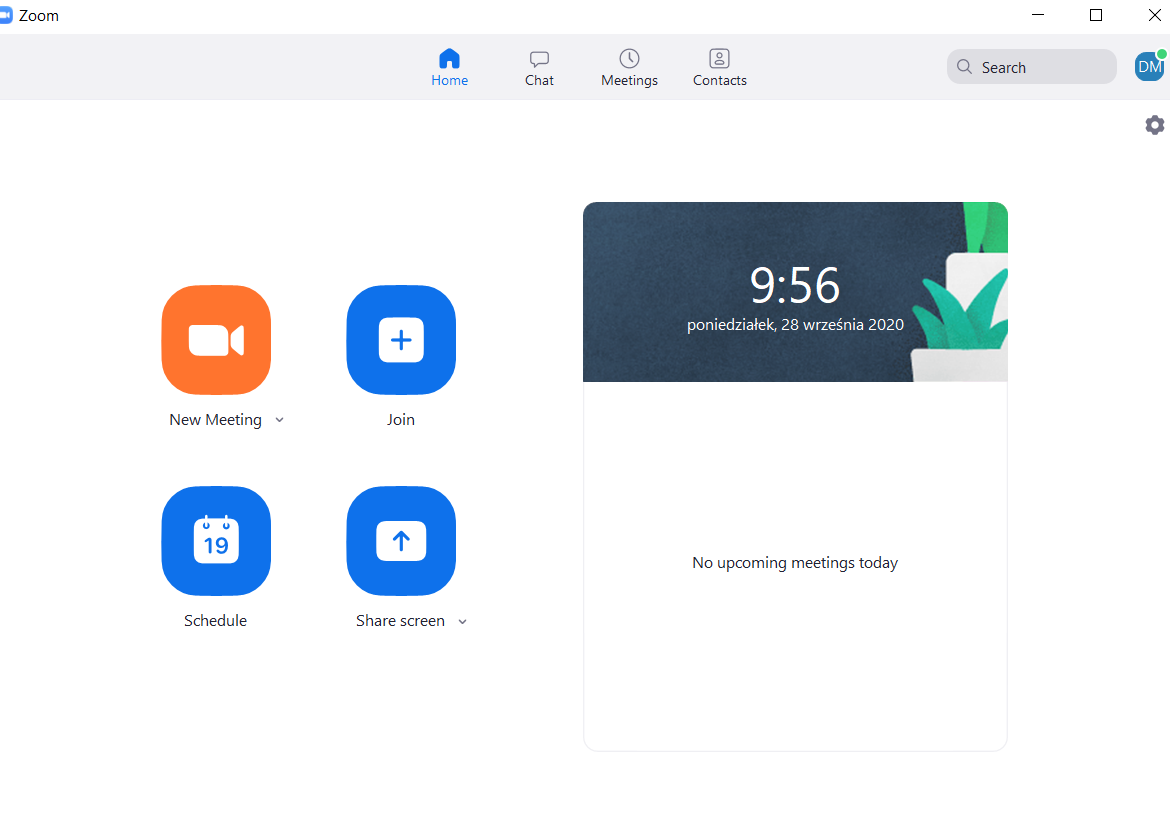
7. View of the launched Zoom client.
To organize a webinar, i.e. a virtual meeting for mass audiences (above 300 participants):
Report a need to organize a webinar by sending an e-mail to:
vc@pwr.edu.pl lub
zdalne@pwr.edu.pl. The maximum number of participants is 500. The e-mail should include the following information:
After a license is provided by the Zoom admin (which serves as a confirmation of assigning the webinar date), the organizer will receive an e-mail message with the link to the webinar, the Webinar ID and the Passcode. Questions and problems should be reported to:
zdalne@pwr.edu.pl.
It is possible to test the webinar mechanism beforehand. For that purpose you should contact the Zoom admin (by e-mail written to
zdalne@pwr.edu.pl)) and provide dates acceptable for the tests.
Participants in teleconferences or webinars can be registered via
https://conf.e-science.pl/ (Indico). Owing to such an organization method: the personal data of the participants can be managed locally, the required information clauses can be provided, the meeting materials can be published, and the agenda, as well as questionnaires etc. can be prepared. Questions and problems should be reported to:
zdalne@pwr.edu.pl.
Currently, the Zoom login process can only be completed through the New Authentication System, using your Active Directory account credentials.
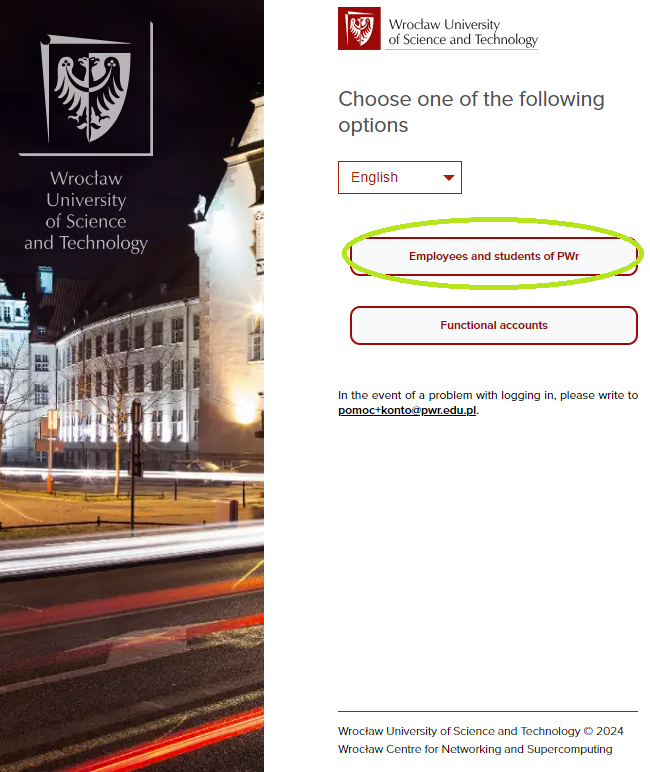
1. Click the Employees and students of PWr button.
2. Enter your AD account login and password, then press Log In
3. If this procedure does not work, reset your password by following the procedure described in
SSO - password reset.
4. After the password has been reset, return to the login page to log in. Your login is the account name (received in the password-change e-mail) or your e-mail address.
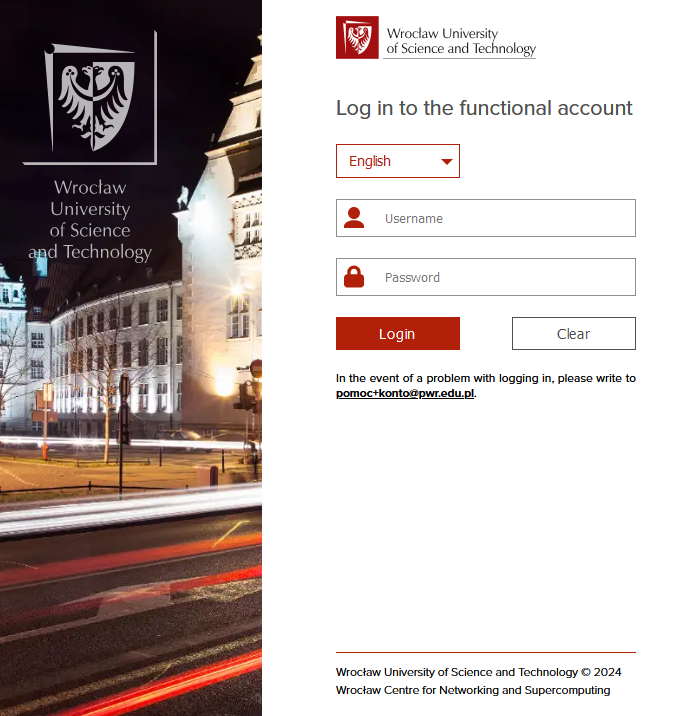
1. Click the Functional accounts button.
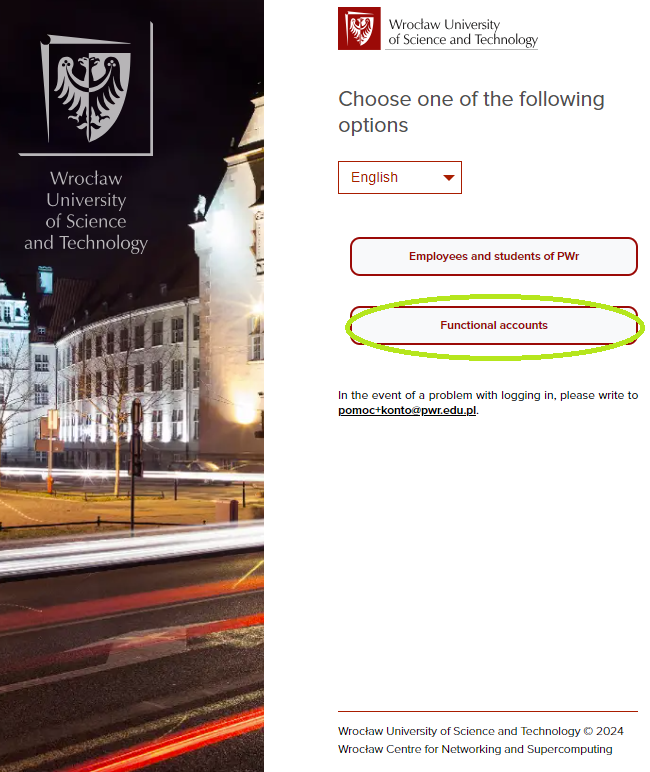
2. Enter your account username and password, then press Log In
A videoconference can be accessed directly via a link to it. Such a link is generated after the videoconference is scheduled in the system and should be sent to the potential participants. The student login process for Zoom is provided below:
- Open the link to the videoconference.
Install the Zoom client, if needed.
If you log in from mobile devices, Android or iOS, download an appropriate client from the Google Play or App Store, respectively.
- Choose the Sign in to Join option.
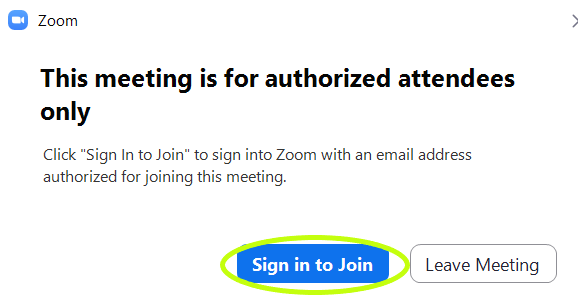
Click the
Sing in with SSO button.
Do not provide your e-mail address or your password in the Zoom application window. You can log in only via the WUST website.
Provide the SSO address: pwr-edu and click Continue.
By using the institutional SSO mechanism to log in the Zoom service, you ensure that your credentials (login and password) never leave the WUST infrastructure.
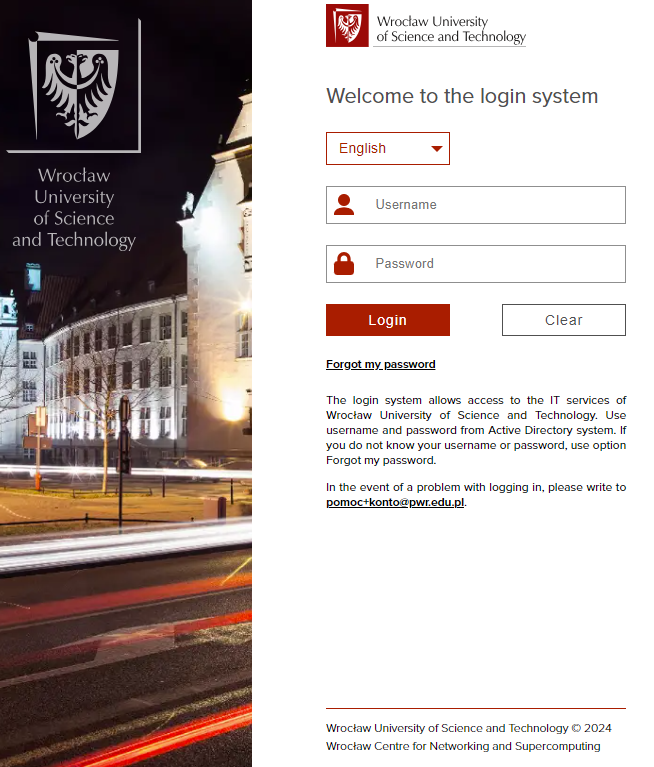
Your web browser will be redirected to the WUST institutional login website.
In the next step, click the Employees and students of PWr button. then provide your login and password and press Login.
Then enter the login and password for your AD account, then press Login.
In the case when this procedure does not work, reset your password by following the Forgot my password link. Enter your student e-mail address and type in the letters from the captcha image. Then press OK.
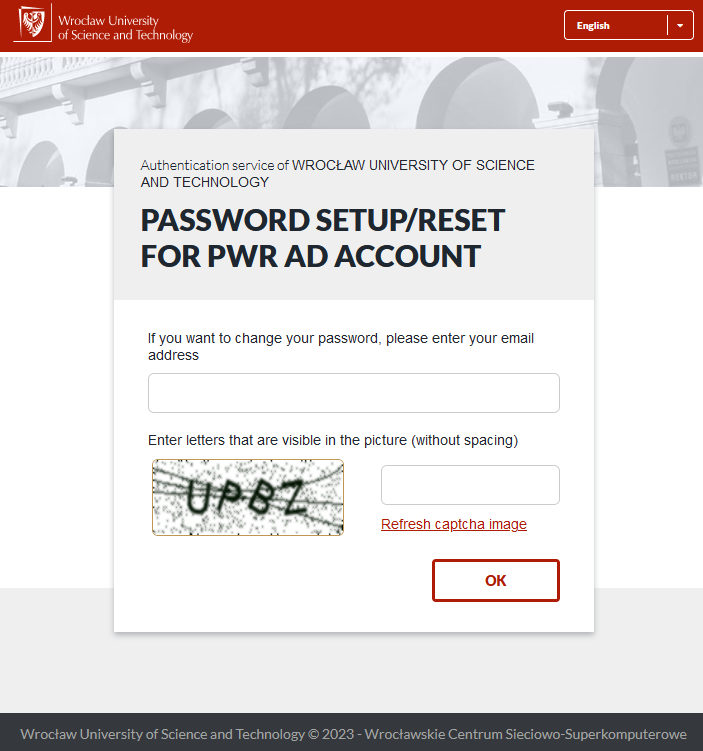
A message with a link to change your password and with your account name will be sent to your mailbox. By clicking the link you will be redirected to the password change website.
Enter new password and press the Change password button. When changing your password, follow the Password policy.
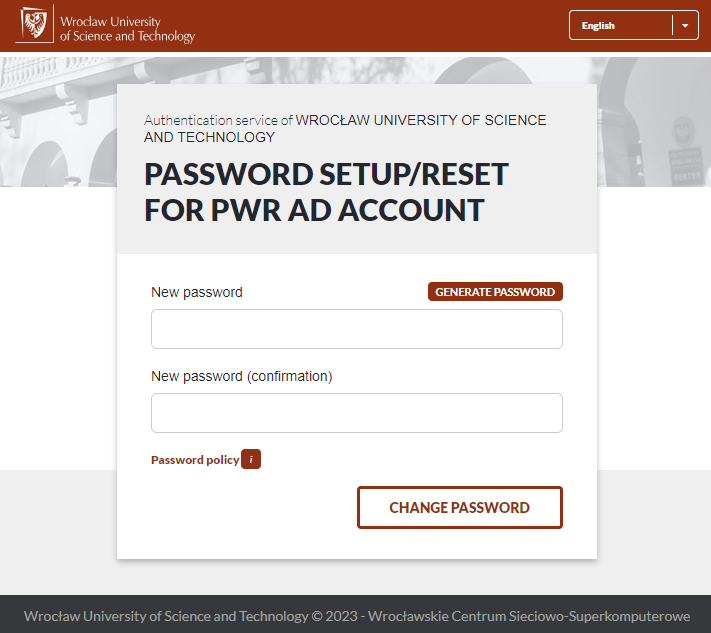
After the password has been reset, return to the login page to log in. Your login is the account name (received in the password-change e-mail) or your student e-mail address.
Choose the Join with Computer Audio option (if you don't have a microphone, you can use a phone call option – the relevant information can be found in the Phone Call tab).
The Virtual Classroom support system allows you to plan your classes in the form of videoconferences and is available at
https://vc.pwr.edu.pl/. To use it, log in using the username and password from the Active Directory system.
If you do not know your username or password, set up/reset your password for AD account by following Forgot my password link.
If your account in the videoconference system is not active, you must activate it by clicking the
Activate option. The activation process will open a separate tab in your browser and will ask for permission to provide your data to the operator of the
zoom.us. Then return to the
https://vc.pwr.edu.pl/ tab and reload the page.
Classes/meetings which are expected to last longer than 40 minutes or to be attended by more than 2 participants should be scheduled with the use of the https://vc.pwr.edu.pl/ service. This scheduling method allows you to remove the limits of the Basic account. During the scheduled meeting, the user becomes a licensed user.
After logging in, the user will see an interface with three tabs: Courses, Meetings and Incoming courses/meetings. In the Courses Courses tab, you can find the list of your groups (Fig. 1). Each group is provided with the list of students enrolled in the group (it can be copied by clicking the Copy to clipboardbutton) and with the class dates for the upcoming two weeks. The list is updated cyclically. Note that individual class dates can be planned no sooner than a week before they start.
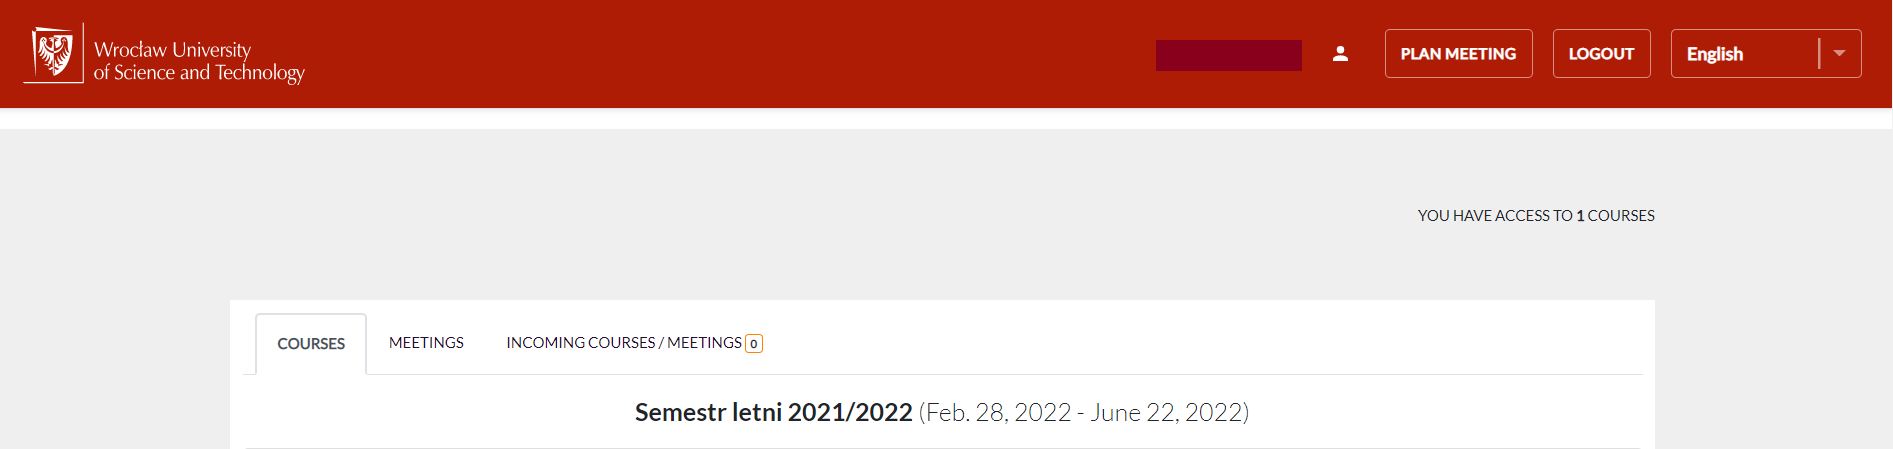
Fig. 1. Interface of the Virtual Classroom support system
In order to plan the classes from the level of the USOS system, choose the time for a group (Fig. 1a) and press the Plan button. This will automatically schedule a videoconference on the Zoom platform for the selected time and send send an e-mail notification to all students in a particular group and to the host (in both Polish and English to the students and only in Polish to the host) together with a link to the videoconference and with an instruction on how to join. The maximum number of participants in such a meeting is 300. In the case when you need to cancel the class inform your students via e-mail. In the Courses tab on the main page of the system, there is a list of students assigned to particular classes. This can be copied do clipboard and pasted in the mail service.
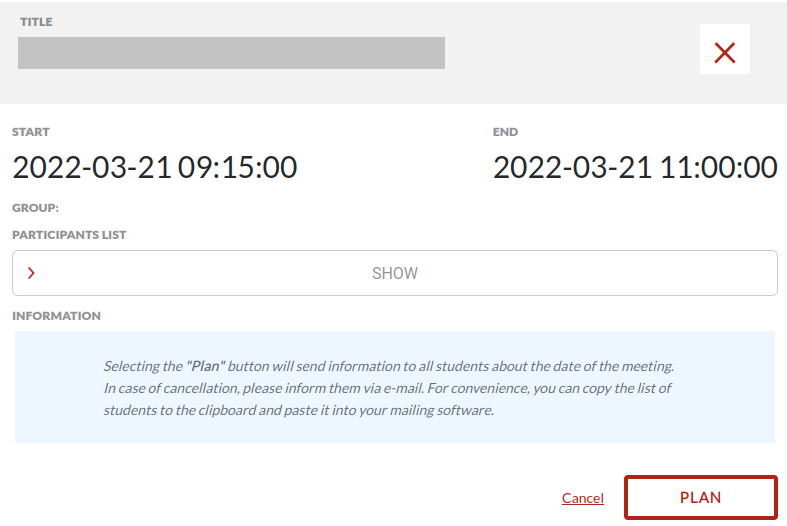
Fig. 1a. Scheduling a class
The Virtual Classroom support system allows a meeting to be planned for any time. The meeting can be attended by a maximum of 300 participants and can last a maximum of 240 minutes. To schedule a meeting, go to
https://vc.pwr.edu.pl/dedicated-meeting or select the
Plan meeting option in the top right corner of the
https://vc.pwr.edu.pl/website. Next, complete the form, i.e. provide the title, description, the start time and the duration (in minutes). You can also complete the participant list, by providing their e-mail addresses.
The following meeting options are also available:
Login required (activated by default) – access to the meeting is granted only to participants logged in to the Zoom application with the WUST credentials (students and employees). In the case when the meeting is expected to be attended by a participant from outside the university (who does not have the university's credentials), this option should be deactivated.
Waiting room (when the function is activated) – the participants are not allowed in the meeting directly, but instead they wait in the “waiting room,” and are invited to the actual meeting by the host. This option should be used if the Login required function is deactivated.. It is a security measure preventing unwanted participantsfrom joining the meeting. The waiting room allows the host to effectively manage the participants in the case when the meeting is expected to be attended by participants from outside the university, who do not have the student/employee credentials.
Join before host – by activating this function you allow all invited participants to join the room (meeting) before the meeting starts.
Attach calendar file (ical)
Add participants to ical file
After the form has been completed, click Plan. This will automatically schedule a videoconference on the Zoom platform for the selected time and send an e-mail notification to all participants in a particular meeting and to the host (in both Polish and English to the participants and only in Polish to the host) together with a link to the videoconference and with an instruction on how to join. Details of a meeting thus planned will be stored in the Virtual Classroom support system, in the Meetingsbar. In the case when you need to cancel the meeting inform the participants via e-mail. In the Meetings tab on the main page of the system, there is a list of participants assigned to particular meetings. This can be copied do clipboard and pasted in the mail service.
Access to the planned videoconference via a link sent to the host and to the students/participants is described in the
Videoconference system -> Access to the videoconference via link. All of the planned meetings can be also accessed via the Zoom platform, on the following website
https://pwr-edu.zoom.us/meeting.
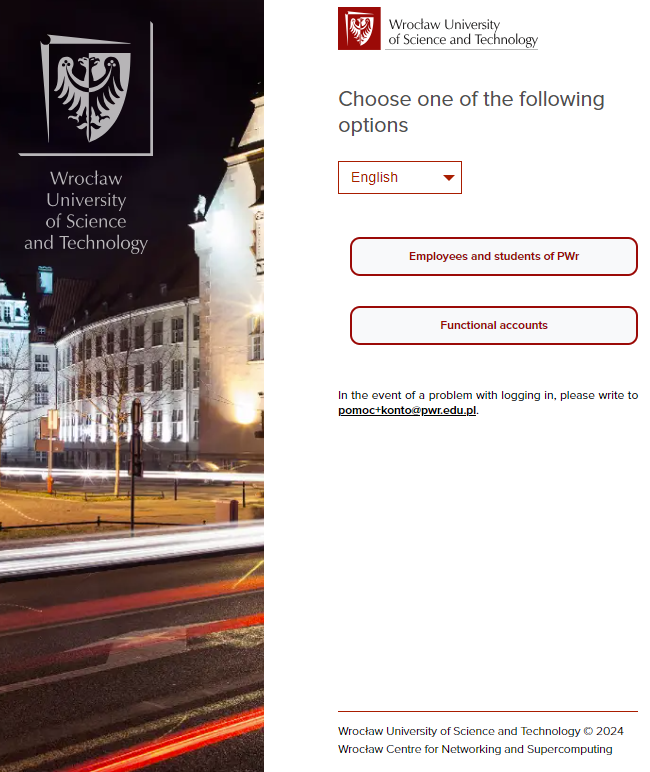
To access the videoconference system on the Zoom platform, go to
https://pwr-edu.zoom.us/ and click
Zaloguj (Fig. 2) in order to log in (Fig. 3).
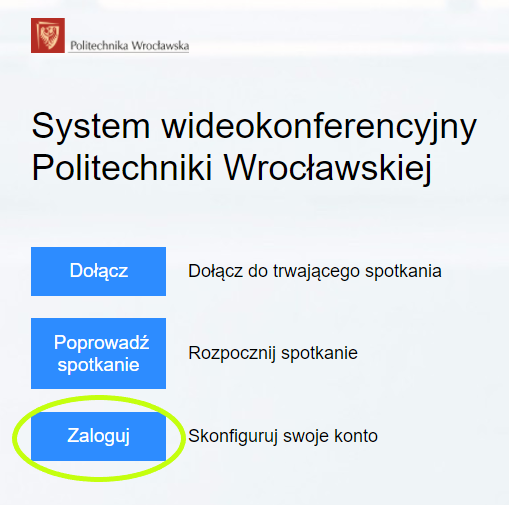
Fig. 2 The Wrocław University of Science and Technology videoconference system
When logging in for the first time, the user will be asked to grant access rights to his/her personal data to Zoom Video Communications Inc. seated in the United States.
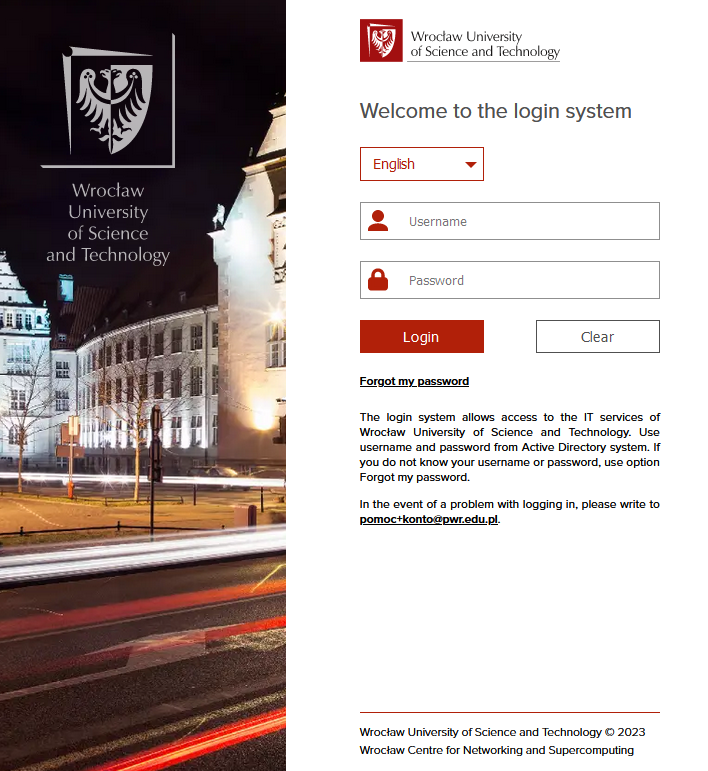
Fig. 3 Logging in to the videoconference system
A videoconference can be accessed directly via a link to it. Such a link is generated after the videoconference is scheduled in the Virtual Classroom support system and should be sent to the host and to the participants. The meeting can be joined from the Windows, Linux and MacOS operating systems and from the Android and iOS mobile devices. To access a videoconference:
- Open the link to the videoconference.
Follow the instructions – install the Zoom client, if not installed yet, or download it from Google Play or Android Store.
- Select login in the message If you are the host login to start this meeting.
- Click Sing in with SSO (Fig. 4).
NOTE! Do not provide your e-mail address or your password in the Zoom application on the left side of the login panel. You can log in only via the SSO mechanism.
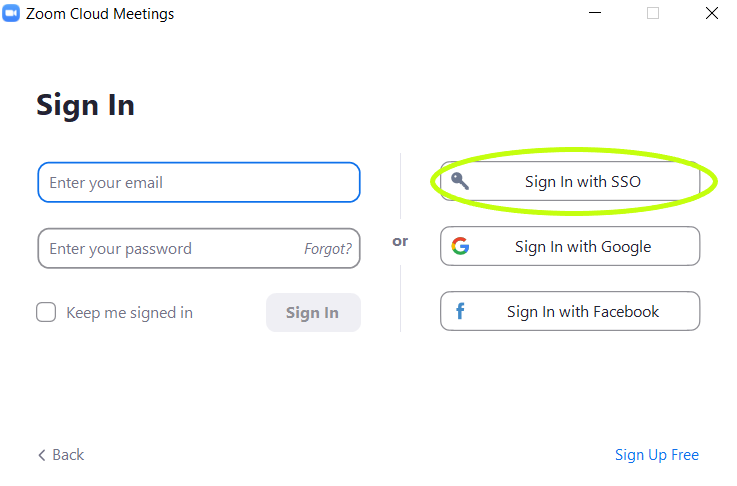
Fig. 4 Selection of the login options
Provide the SSO address: pwr-edu and click Continue (Fig. 5). PYour web browser will be redirected to the WUST login website.
By using the institutional SSO mechanism to log in to the Zoom service, you ensure that your credentials (login and password) never leave the WUST infrastructure.
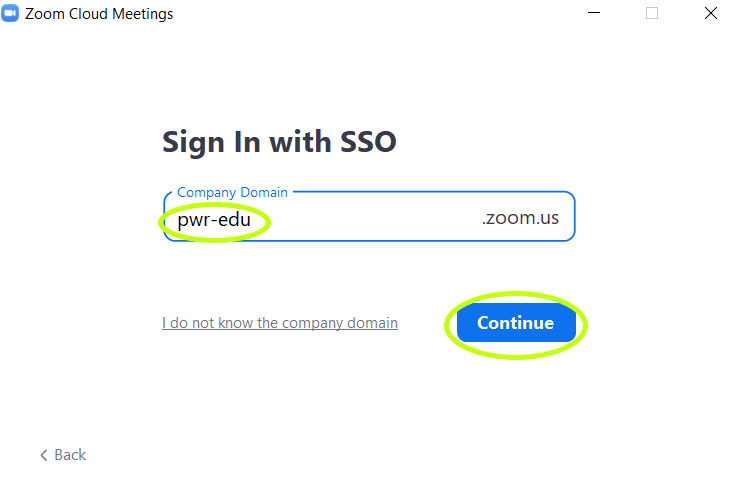
Fig. 5 SSO address
6. Login with your WUST credentials, as described in the
logging-in chapter.
Fig. 6 Logging in to videoconference
Choose the Join with Computer Audio option (if you don't have a microphone, you can use a phone call option – the relevant information can be found in the Phone Call tab) (Fig. 7).
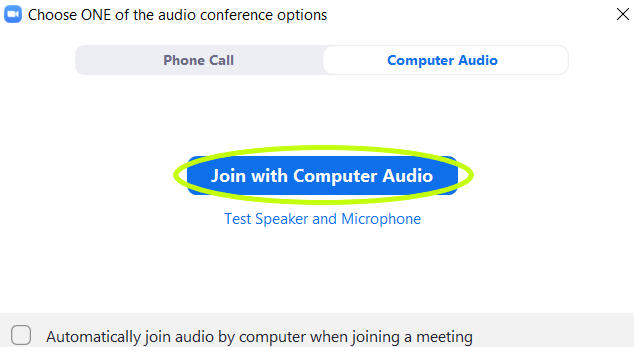
Fig. 7 Selection of the audio options
To launch a videoconference, use the videoconference link or click
Start next to a videoconference selected from the list in the
Meetings tab on the Zoom platform (
https://pwr-edu.zoom.us/meeting). The meeting can be joined from the Windows, Linux and MacOS operating systems and from the Android and iOS mobile devices. On the first attempt, you will need to install the Zoom client. To do that, follow the instructions on the screen.
After the Zoom client is installed successfully, there will appear a videoconference window (Fig. 8) and a smaller window, in which you should click Join with Computer Audio (if you don't have a microphone, you can use a phone call option – the relevant information can be found in the Phone Call tab) (Fig. 7).
In the application, you can make both voice and video chats, manage the participants, invite new participants, make questionnaires, put participants into breakout rooms, share screen and record the videoconference.
To end a videoconference, click End End in the bottom right corner of the application window (Fig. 8).

Fig. 8 Videoconference options
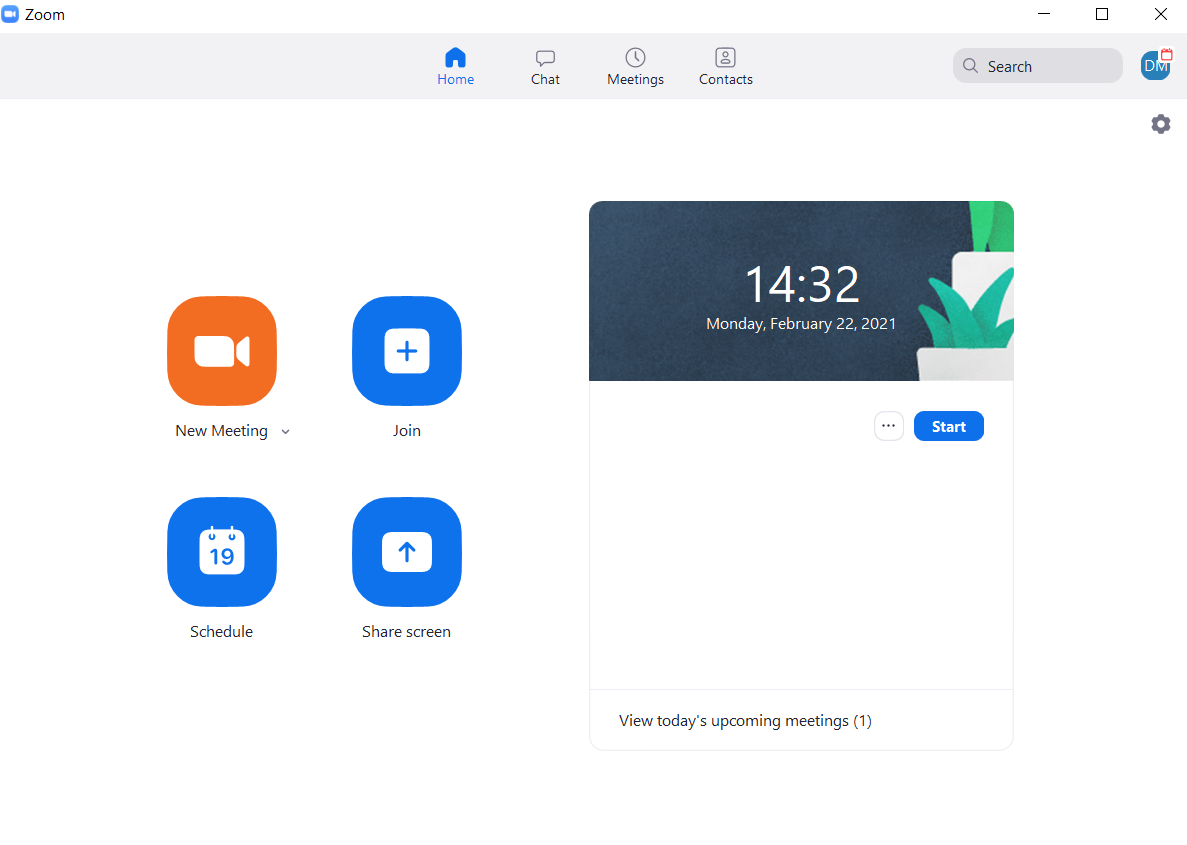
Fig. 9 View of the Zoom client
When organizing Zoom Meetings, the highest (possible) security measures should be implemented. If the meeting is to be attended by participants from outside the University, enable the Waiting Room. It provides a control over which attendees are allowed in the meeting.
Note that at any time during the meeting you can limit/withdraw any permissions given to the participants: you can mute/unmute them, enable/disable their video, enable/disable/limit the chat, enable/disable the whiteboard option or move a participant to the waiting room. If needed, a participant can be also removed from a meeting.
It is recommended that events such as conferences/seminars/symposiaare planned in the form of a webinar. This type of a conference significantly limits the participants’ permissions to edit/communicate with each other etc.
If all participants must be muted during the meeting, press Mute All, as shown in the figure below (Fig. 10). Note that this function does not mute the participants permanently. When the option Unmute Themselves (Security -> Allow Paticipants to -> Unmute Themselves) is enabled, the muted participant may unmute him/herself despite being muted by the host.
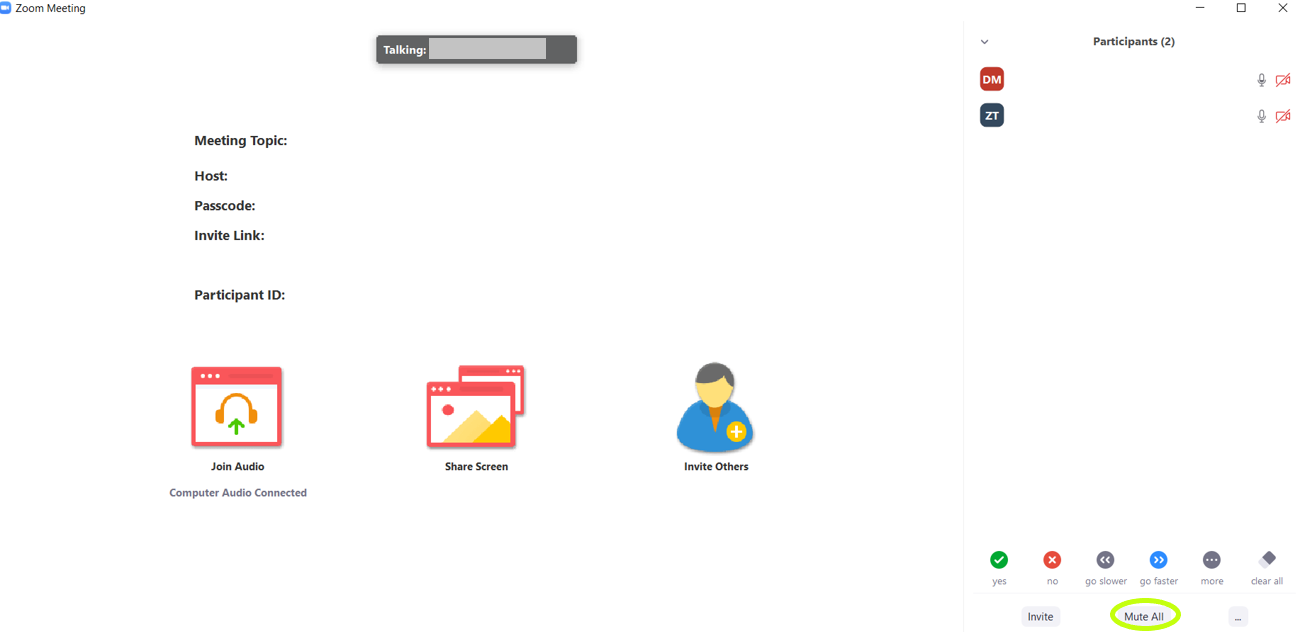
Fig. 10 The Mute All button
When the host function is assigned to another participant during the meeting, the person which organizes the meeting can reclaim their host status. For that purpose, click Reclaim Host (Fig. 11).
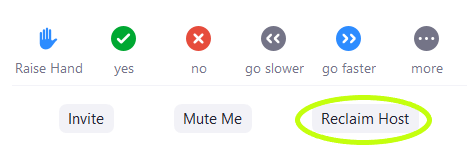
Fig. 11 The Reclaim Host button
The host/organizer can remove a participant who disturbs the meeting at any time. To do so, click Remove. On the participant list, next to last name of the person to be removed, click More (Participants -> More -> Remove) (Fig. 12).
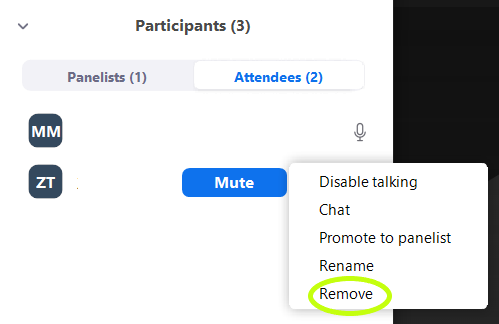
Fig. 12 The Remove button
All problems and errors should be reported to vc@pwr.edu.pl.